Showing posts with label Beauty Treatments. Show all posts

Friday, 25 April 2014

A Spring Clean On My Life


It's one of the greatest ironies of life: 
We're too busy to deal with the stuff that makes us feel busy.
Tackling them always feels like a project, the kind you'll get around to when you have the time. 
Yeah Right...

"The key to a calmer existence is finding small, everyday solutions for stressors and releasing clutter." 
"When you start to let go, your life lightens up because you have less to think about and less to maintain,"
There has never been a truer word said, in my case anyway.

Last year I was in a very stressful position in my job and my entire schedule revolved around work. It eventually took it's toll on my health. 
Deciding to step down from the roll I held was one of the best decisions I have ever made.

I found my health improved, my state of mind was clearer, my anxiety was reduced and I just had a better outlook on life in general.
I immediately found a replacement position I was extremely happy with and my work day became an enjoyable experience as opposed to a dreaded weight I carried around for 10 hours a day.
I also met my boyfriend on the same weekend.
Things seemed to be falling nicely into place.

It is really important for our sanity that we take a step back every now and then and see where we are in our lives and if things are progressing as we would like.

This month with my injury I had some spare time, (some) as I wasn't spending as much time working out. 
I decided to start de-cluttering and making changes to;
My wardrobe
My digestive system
My hair
My mind
My Time
My Skin

A random list it might seem, but these were all areas I felt I was a little anxious about and perhaps needed to focus a bit more on.

So..
What Did I Do:


Have A Plan. 
Most people's to-do lists actually create fatigue, because they don't clarify how, exactly, they are going to handle things, so tasks feel bigger than they are. 
Take a second to jot down how you'll tackle something.
Then, Just Do It. 
If something can be done in two minutes, go ahead and get it done. It will take you longer to look at it again than it would take to finish it the first time you think of it.

My List:
MY TIME:

My days seemed to be melting into one another and I was finding I had no time to relax after a busy day in work.
Take note of how you are spending the majority of your day. 
See where you are wasting time and try to figure out how you can utilise your down time to the best of your ability.
While on the bus make a list of things you need to do, research on your smart phone while standing in q's or while waiting at appointments.
Pay bills online and shop online where possible to save you travelling to different locations.

MY MIND:
Get rid of people that are bad for you!
Such a difficult thing to do but a vital one if you want to get peace of mind.
I have a habit of keeping in contact with the wrong people, and I hate to fall out with people so I try to always keep the peace, ex boyfriends included. This is all well and good if you can distance yourself, if not it can start to affect you in lots of different ways and can stop you progressing with your life in the here and now. 
I learned this the hard way.
This year I made a conscious decision to cut ties with people I knew were having a negative affect on my life. 

MY HAIR:
I have had the same blonde highlights for years and decided I would like a change. Having tried the chop and a fringe I decided this time I would play around with my colour.
I opted for Blonde Ombre and some balyage.
I am delighted with the results, not too drastic but a welcome change none the less. 

MY DIGESTIVE SYSTEM:

Two words; Colonic Irrigation.
 I am obsessed.
Also known as "colon hydrotherapy", colonic irrigation is a safe and effective method for cleansing the colon of waste and impacted material by repeated flushing with water.
Those that know me well will know about my passion for colonics. 
A cleanse from the inside out, with the added bonus of complete hydration.
I try to have a colonic every couple of months and I find my skin, my hair and my nails all benefit from a good colonic. 

MY WARDROBE:


I love a good wardrobe clear out.
My younger cousin does too as she usually gets to rummage through whatever items I have decided to get rid of, some of which still have the tags on. I am an impulse buyer and often get carried away. Days later realising I may not even like the items all that much.

MY SKIN:
I love doing skin treatments and will do a skin peel or a microdermabrasion or skin needling at least every 4-6 weeks.
I decided to use the Dermadart, a form of skin needling as I felt I needed a little collagen boost.
Here is a post I've written on skin needling and it's benefits:
http://loveprotectreflecttheskinyourein.blogspot.ie/2013/04/skin-needling.html

This was my skin directly afterwards.


This was my skin four weeks later!!

LOVE this treatment.

I am about to embark on my New Fitness Regime which I will be releasing daily posts on.
It is more or less taking my workouts back to basics and re-focusing on my diet. 
 All the details will be up on the blog on Sunday!!
Stay Tuned :)

Thursday, 5 December 2013

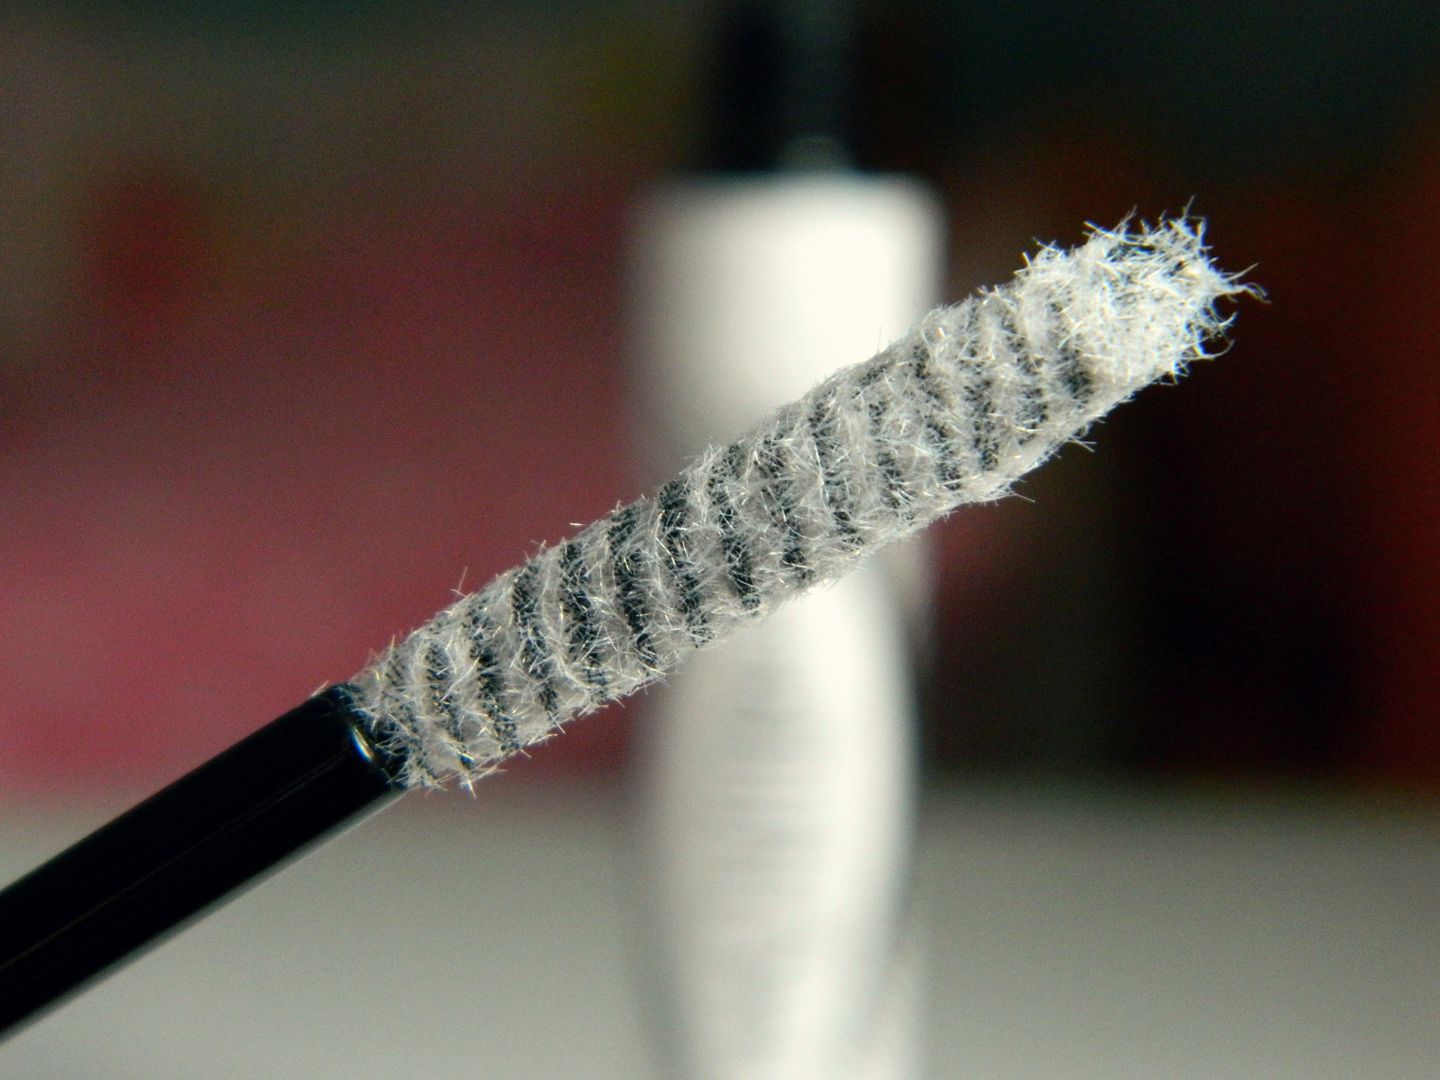
Magnifibres brush-on false lashes


Magnifibres natural brush-on false lashes

No glue, no mess, no fuss.
 Just glamour. 
Magnifibres is the perfect solution for those who love long, big, eye lashes but don't like the hassle of false lashes. 
100 per cent natural brush-on fibres create an immediate and stunning false lash effect - achieving length and volume beyond belief. 
Magnifibres are very easy to apply and since they stick to your actual lashes they look completely natural.


How to use:

Step 1: 
Apply your own mascara as usual and immediately move onto step2.

Step 2: 
Apply Magnifibres onto your lashes while the mascara is still wet, using the same technique as if you were applying mascara.

Step 3: 
Wait 30-60 seconds so the fibres can stick to your lashes, then apply a second coat of your usual mascara to cover the white fibres.


BEFORE + AFTER


A good tip is to make sure you use a wet mascara, if your mascara is old and dried out the fibers won't stick. You also need a mascara with a big wand type head as combs just brush the fibers off.

I use gloMinerals Volumising mascara and I find it works great.
Click on the link to find out more about gloMinerals.
http://loveprotectreflecttheskinyourein.blogspot.ie/2013/04/glominerals-make-up.html


Black

Before.              After. 

I LOVE this product, I have tried every type of false lash and lash extension, this product does it all for me. 
Results in seconds that last all day until I remove my make up!!
 Retails at 25Euro.
We have just started stocking these and they are flying out the door.


Thursday, 10 October 2013

Manzilians


What's a Manzilian?!
Commonly referred to as a "boyzilian," a manzilian is the complete removal of hair from a man's crotch. 
The most common question asked by men contemplating the manzilian is; Does waxing hurt?
Yep. The pain does fade within seconds and subsequent sessions hurt less than the first session. But it does hurt.. In saying that, it is a much better solution than shaving. Shaving stimulates potential hair growth and can strengthen the hair follicle. Shaving also cuts the hair at the hair shaft, which not only re-grows with a stubbly feel, but it allows the hair to re-grow the next day or in some cases the same day.

So, what does it all involve you ask!!
The hair is trimmed, if necessary, and then wax is applied a little at a time. The hair is removed and the procedure continues.  The wax used for this procedure is alternated between a strip wax and a non-strip wax. While waxing, it's best to pull the skin tight, so you may be asked to help stretch an area with your hand. After the hairs are removed, a cooling solution is applied to help soothe the area. And then you exhale at this point :)

I think everyone remembers this scene from the 40 year old virgin! Don't let it put you off, when professionally applied the wax will not hurt like this!

There are some possible side effects to waxing but they can they be minimised.
Although you can not predict or guarantee who may react, most clients do not experience reactions beyond redness and minor irritation. Hair may break at the root during waxing, causing some hairs to grow out faster. 

Follow these guidelines to minimise irritation and possible break outs

Avoid the sun immediately after waxing and wear sun screen; recently waxed areas are prone to hyperpigmentation (permanent darkening of the skin) if exposed to the sun.
Avoid heavy exercise for at least 24 hours after waxing.
Do not use exfoliating products (AHAs, scrubs, etc) and loofas for at least 24 hours after waxing as they might further irritate your skin.
Avoid tight clothing after waxing, especially in the waxed areas. Tight clothing may result in irritation and ingrown hairs.
No hot bath, hot shower or anything that will create heat or friction in the area for 10 hours after a Manzilian. While your pores are open, they are vulnerable to irritation by hot temperatures and infection by bacteria.

Depending on the density of the hair growth, your waxing appointment will take about a half-hour.


A lot of men tend to trim the area before coming into the salon, please do not do this!! If the hair is too short it is impossible to wax. It needs to be at least 1/4 of an inch or just leave it at full growth.
Everybody grows hair differently; it will last for two weeks for a clean look. Four weeks is the average time in between waxing.
The hair will come in finer and start to thin out over time. So eventually, you may wax less.

There are a couple of reasons why you may possibly have a breakout after waxing. After the hair is pulled out, the sebaceous gland (oil gland) becomes overly stimulated and causes a pimple like reaction. There are certain products for preventing ingrown hairs and breakouts and you can ask the therapist to recommend something.


I recommend Lycon's ingrown- it solution applied daily after waxing.

When not to wax
You should not wax if you are on Retin-A, Renova, Accutane or any other skin- thinning product that is designed to clear the skin of acne taken topically or orally. Read the ingredients on your moisturiser. Almost all moisturisers for oily skin contains some product for acne. Please refrain from using your moisturiser at least 24 hours prior to your wax. You also shouldn't wax if you have a systemic disease or if you are sunburned.

Prices
Prices really vary from place to place, I always recommend salons that specialise in waxing, the therapists are more confident, they usually take less time and can offer cheaper prices. 
Expect to pay anything from 45Euro to 70Euro depending on the salon.

If you are looking for permanent removal I definitely recommend laser hair removal. I work with Candela Laser and it is the most effective form of permanent hair removal available on the market.
Treatments are quick and easy, (about 20 minutes) and virtually pain free as we use cryogen to cool the skin alongside the laser. 
Treatments start at 110Euro per treatment and a course of six is recommended. Discounts are always offered if you purchase a course of treatments.

Friday, 13 September 2013

Lip Tips! x

How to make lipstick last longer


STEP 1 - Exfoliate: 
To get your lips soft  and allow your lipstick to smooth on better, gently buff your lips with an exfoliant and clean away the residue with lukewarm water or a damp cloth. You can also pat on a clear, nourishing balm afterwards and give it a few minutes to sink in before blotting with a tissue. This will help hydrate your lips so the lipstick holds better.

STEP 2 - Lip liner: 
Lightly trace a lip pencil in the same colour or slightly lighter than your lipstick along the inside edge of your lips. This will add a layer of pigment and help your colour last longer while also preventing feathering and bleeding.

STEP 3 - Lipstick: 
For stellar colour payoff, apply your lipstick straight from the tube (long-wearing formulas are best for colour longevity). You can also use a lip brush for a more subtle effect and better distribution.

STEP 4 - Tissue:
 Blot your lipstick with a tissue by folding it in half, opening your mouth, placing it in between your upper and lower lips and pressing down. This is great at removing excess oil and preventing lippie from getting on your teeth.

STEP 5 - Powder: 
To seal the colour, load up an eyeshadow blending brush with loose or pressed powder, then swirl the brush across your lips until they're totally mattified. You might notice that your lipstick goes a touch lighter, but the long-wearing benefits will be worth it.

STEP 6 - More lipstick: 
Add a last layer of lipstick! You can clean up any product that's escaped your natural lip line with a teensy bit of concealer on a lip brush.


Tuesday, 20 August 2013

Debs- Some Helpful Tips!!


Debs coming up - no time to speak?

You will want to look your best and you can. Just follow the pampering programme and make-up tips provided below by Tara Murphy, Beauty Consultant and Owner of Invogue Beauty Saloon and you will be ready to dazzle.

Perfectly polished and painted nails scream sophistication and glamour. If you want these nails for your debs remember your feet as well as your hands. On giving yourself a DIY professional manicure/pedicure, start by filling the nails and applying a small amount of cuticle cream and gently pushing the cubicles back with an orange wood stick. Do not use metal as you could damage your nail. Then apply some hand cream to soften the hands. When working on your feet remember to file down the hard skin before applying the cream. Use nail polish remover to clean away any oily film left on he surface of the nails. Then apply a basecoat to protect your nail, followed by 2 coats of your desired polish and add shine to your nails. If you want to go that extra sparkle and bling why not try some nail art designs and diamonds at your favourite Beauty Salon.


We are not all born with perfect skin but are you listening to your skin? It is trying to tell you what it needs. If you can interpret its sensations and textures you will be able to care for it much better in the future. Your skin is the canvas for your makeup; a perfect skin will help to give a perfect make up. However if your skin is dry, oily, congested etc there is only so much that your make up can do! A daily cleanse, tone and moisturize day and night with the correct products that suit your skin is vital. Then weekly it is important to exfoliate to rid the skin of dead cells and excessive oils. This is often followed by a mask for 20 minutes to leave your skin looking radiant. However if you feel that your skin is still not at its best, then a professional facial may be needed. A visit to your favourite Beauty Salon a few months before the Debs will allow the skin to be perfect for the big night especially if a few treatments are needed. Also Mum’s often enjoy coming along for a few treatments and make a day of it.

False Tans
There are many false tans on the market however the same pre and post care applies to them all:

My Favourite tans and tips on application:


SCRUB - Exfoliate for up to a week before the tan but not the day of the false tan application.
SHAVE or WAX IT -The day before the tan.
OUTFIT CHECK - Wear Dark clothing and loose fitting shoes the day of the application.
MOISTURISE - after each shower to keep up the tan, but not before or the day of the tan application.
PAT DRY - after each shower and do not rub the skin
SWEATING is a big no after the tan application. Do not carry out any exercise until after your first shower after the application
Note – If you have sensitive skin do a patch test before tanning.

Tanning is very important to get right for your Debs night. You must remember that there are different shades of false tans, so if you have a pale complexion it is better to use a lighter colour tan. It is always possible to add more tan if desired but not so easy to take it off. The most popular tans are the spray on tans. Air wraps around the tanning spray which effectively allows it to dry as you spray avoiding streaking and giving you a perfect tan in 10 minutes. If you are unsure about tans it is advisable to do a trial a few weeks in advance and not the week of the event. There are many different shades of tan that can be applied according to your skin tone and preference. Remember the tan application should be carried out the day before your big night and not the day of it!!


Make up
Your make up application is only as good as the brushes you use so use great brushes!! High quality brushes allow you to apply and blend better than anything else. At the minimum you need a fluffy powder brush, a flat eye shadow brush, a tapered blush brush and an eyeliner brush.

Foundation
You should try and get the nearest colour foundation to you own skin tone. An off colour base will make every other cosmetic you apply just look not quite right. Mixing foundation and moisturiser can give a good tinted moisturiser. If you have discolouration or spots on your skin apply concealer on the problem areas before applying your foundation. Apply foundation with a make up brush or sponge.

My Recommendation is Glo Minerals Make Up:

Powder
Set your foundation with loose powder applied with a big fluffy brush. This sets every type of cosmetic from foundation, to eye shadow to even lipstick!! Pick a loose powder with a yellow undertone to make sure that it works with your skin tone.

Also deposit extra powder under the eyes to catch any eye make up fallout. Then brush away.

Most women’s eyelids are translucent therefore looking bluer or darker that the rest of the face. This discolouration can affect the colour of the eye products that you wear. Before applying your shadow prime the lids with a special base for lids or a light swipe of your foundation followed by powder. Not only will this even the tone but it will also make your shadow last longer into your big night. An iridescent shadow opens up the eye area and gives a hint of party sparkle. To achieve the look of dark dramatic eyes use a Kohl pencil to outline top and bottom lashes and follow with a black liquid liner to top lashes only.

Eye Liner

Eyeliner Tips:

There are pencil, liquid and cake eyeliners. Pencil liners can be used above the top lashes and below the lower lashes. Liquid liners should only be used above the top lid. Cake eyeliners are used with water are used both top and bottom.

Eye Lashes
Make sure lashes are free from any make up. Curl the lashes with an eyelash curler. Then get a hand held mirror and hold it down and look into it. This will allow you see the root all the way to the tips of your lashes. This gets the best length possible, Maximise length – look down into a mirror, got it!!

False Lashes

Everlasting Lashes:

Eyelash extensions are a new method of enhancing the length and thickness of lashes. They are applied on a lash by lash basis for a totally natural look. They can last from up to 6/8 weeks. If you want that eternally feminine and seriously seductive look, then eye lash extensions are the way to go!! They should be applied a few days before your big night at your favourite Beauty Salon.

Highlighter Stick
If it is ophthalmologist tested it can be used as a highlighter under the eyebrow and high on the cheekbones and lips. They illuminate a tan nicely

Cheeks
Sweeping on cheek colour in strips in an effort to create cheekbones only succeeds in making you look dated!! For a more classic attractive look apply blush to the apples of your cheeks. Before applying, smile and apply in a circular sweeping motion for an instant fresh look. Avoid swiping the blush towards your hairline.

Lips

Current Lip Trend:

To make your lips appear fuller use a deep shade of lip colour at the outside corners of the lips. Then apply a lighter colour (similar shade) to the centre of the lips. Remember light brings forward and dark recedes. Lip gloss can then be applied in the middle of the lips to give that sexy pout effect.

Lipstick Choice
The type of lipstick depends on your individual taste. Matte lipsticks last longer but are drier in texture. Cream lipsticks give good coverage and contain moisturizers. Hydrating lipsticks are good for dry lips. Sheer lipsticks are moist and give the lips a stain. Lip glosses have the most moisture. It is best to apply your lipstick with a lip brush. 

Hope this helps!!! 
xxx

Monday, 12 August 2013

Unwanted Lip Hair


Unwanted Upper lip hair is a problem many women have to deal with.
I had a request from one of my readers to give some advice as to what can be done to remove/prevent this.

There are a number of different methods out there to remove and disguise unwanted facial hair, unfortunately unless the hair is dark and suitable for laser hair removal it is impossible to permanently remove it.
Below I have listed the most popular options. Some of these you can do yourself at home, others should be carried out by trained professionals.


Bleach Method

Choose a cream bleach for facial hair. Cream bleach is appropriate for lightening hairs that are not completely black, just dark. It lasts for up to 2 weeks. Be sure to only choose bleach that is recommended for use on the face; since the skin here is so sensitive, you have to be extra careful to avoid irritation.
If applicable, choose a cream that suits your skin type (ex. dry, oily, etc.).
Always spot-test the cream on your skin. Apply a small dab to a sensitive but safe area (such as the skin of your inner wrist) to make sure you don’t react. Leave on for the recommended amount of time, wash away thoroughly, and wait at least another 10 or 15 minutes to make sure you don’t itch or turn red.
Wash your face.
Apply the bleach to your upper lip area. The cream should come with an applicator, but if it doesn’t, put on gloves and use a finger. Be very careful not to get it on your lip itself or near the delicate skin in your nostrils, which can cause your skin to react.
Wait most of the recommended time, then wipe away a small amount to test if it has worked. Use a cotton pad to wipe the cream away (wipe away from your nose/mouth, not toward them) and check to see if the hair is light. If not, wait a little longer.
Ideally, bleaching cream should not be used on the skin for more than 10 minutes because it’s so hard on the skin. If your cream recommends more time than this, test it at the 10-minute mark anyway; if it has worked, remove the rest.
Wipe away the remaining cream. Again, use cotton pads or something similar to wipe up the cream and don’t get it on any sensitive areas.
Thoroughly rinse your skin. Rinse more than you think you need to so that no residue will irritate your skin.


Wax Method

 Ideally you should always visit a trained professional for waxing, it is very quick and you know they are going to do a good job.

 But if you would prefer to do it at home, here is some advice:
Choose a wax that is appropriate for facial hair. Waxing removes hair entirely. You can either get spreadable wax and strips or ready-made strips that already have wax applied (which is the tidier option for home waxing if it's your first time).
Waxing is only possible if the hairs are long enough for the wax to catch on. If you aren’t willing to let your hairs grow long enough to do this, either look for a short-hair wax (some claim to be able to wax as little as 2mm of growth) or use another option listed here (such as bleaching).
Heat up the wax if necessary. Most waxes must be warmed up, but wax strips are sometimes the exception. Read the instructions on your box for details.
Spread wax over the upper lip area. Use the applicator that comes with the kit to spread it carefully, avoiding the delicate skin on your lips.
Apply a strip over your mustache area. Start on one side and smooth it firmly over the entire area, avoiding folds and air pockets.
Quickly rip the strip off on one motion. It will take the wax and your hair with it, but be warned that it will hurt the first few times you try it. Don’t rip it off slowly or in several motions; this will make things worse.
Thoroughly rinse your skin. Make sure not to leave any residue.
Manually pluck any hairs you missed. If your upper lip is still sore from the waxing, you may want to wait a while before doing this.


Depilatory Cream Method


Choose a depilatory cream that is appropriate for facial hair. Depilatory creams painlessly cause hair to fall out from the root, but because the chemicals involved in this process are harsh, it’s best to select a cream designed for delicate facial skin.
Spot-test the cream. Apply a small dab to a sensitive but safe area (such as the skin of your inner wrist) to make sure you don’t react. Leave on for the recommended amount of time (read the box for instructions), wash away thoroughly, and wait at least another 10 or 15 minutes to make sure you don’t itch or turn red.
Spread a thick coat of cream over your upper lip. You can do this with gloves if you prefer, but since the cream needs time to take effect, you can also use you bare hands and then wash thoroughly with soap and water.
Wait most of the recommended time, then wipe away a small amount to test if it has worked. When possible, it’s better to use it for less time to prevent your skin from becoming irritated. If it’s not ready, wait a little longer.
Wipe away the remaining cream. Use cotton pads.
Thoroughly rinse your skin. Rinse more than you think you need to so that no residue will irritate your skin. If some hairs do not come off easily, just try rubbing them gently with water. If that doesn't work, take a bath. The steam coming from the bath should make tough hairs come out on their own.
Manually pluck any hairs the cream missed.


Epilator Method

Choose an epilator that’s appropriate for facial hair. An epilator is a hand-held device that pulls hairs up by the root when moved across skin. The plucking heads on a body epilator will be too big to use on the upper lip, so you’ll have to shop around for a slim model designed for facial hair.
Epilating is only possible if the hairs are long enough for the epilator to catch. If you aren’t willing to let your hairs grow long enough to do this, use another option listed here (such as bleaching).
Hide your lips by pressing them together. This will not only make the skin above the lip easier to access, but also keep your delicate lip skin away from the epilator.
Slowly run the epilator over the skin above your upper lip. Unless you’re very used to plucking these hairs, be warned that it will probably hurt. You will get used to this with time, but in the beginning, it will be uncomfortable.
Start with the slowest speed. Until you get the hang of epilating. Manually pluck any hairs you missed. If your upper lip is sore, you may want to wait a while before doing this.


Electrolysis or Laser Removal Method

Weigh the benefits of each method. Both of these have the potential to be permanent solutions (after enough treatments) and can help people whose lip hair is due to hormonal imbalances, for example.

During electrolysis, a tiny needle is inserted into the hair follicle, where it creates a current that kills the root of the hair. It’s a tedious, one-hair-at-a-time process – that needs to be repeated many times – but since the upper lip is a tiny area, this won’t matter as much.

During laser-hair removal, a laser is used to zap many hair follicles at once and kill hair at the root. You need fewer sessions than with electrolysis, but it’s significantly more expensive. Because the lasers are best at targeting dark hairs that stand out against light skin, it’s not ideal for dark-skinned or light-haired people.
Carefully research locations, practitioners, and prices. Some places have better machines, more qualified specialists, and happier reviews than others. Never choose a location based on their testimonials.
You nedd to have realistic expectations. While laser hair removal and electrolysis can have permanent effects and work wonders for some people, they can also be painful and are not guaranteed for everyone. Also the treatments can be painful and expensive. If possible, talk to other people who’ve had it done for their advice or call in to your local salon for a consultation. Most salons offer free consultations.

Tips

Don't go in the sun for 24 hrs after waxing to prevent your upper lip from getting a pigmentation.
The best time to get rid of your upper lip hair is before bed. That way your skin has all night to get over any redness, irritation, swelling, etc.

Threading is a great alternative for those with sensitive skin, as it won't leave your skin red and blotchy for days. The best way to do this is to go to the salon as this is a skill very hard to master yourself.

Warnings

Depilatory cream does not work on very thick hair.
Don't do this on the day before a big date or an event!! Give your skin some time to recover.
Never use cream for longer than directed, as this may cause severe burning of the upper lip.

Don’t shave your upper lip. Because the hairs all grow back at the same length, the result not only feels stubbly, but also gives the illusion of having grown back thicker (just like a new haircut makes your hair look thicker because all the ends are bunched up next to each other).
Be careful of certain products for hair removal. Many cannot be used on the face because they might cause side effects. Some that can be used on the face will still irritate your skin.

Thursday, 4 July 2013

Big, Bold, Beautiful Brows!

Eyebrows should never be underestimated.

 A perfectly groomed brow can completely change your appearance. And lately it’s all been about the big, bold and beautiful.

Unfortunately not all of us were born with AMAZING brows like Cara Delevingne and some people may have overplucked in the past.
It can be disheartening to be left with pencil thin lines above your eyes and even more so when no amount of eyebrow pencils or quick beauty tricks can undo the damage. 
 Unlike a bad haircut, eyebrows can be tricky and sometimes almost impossible to grow back.

Here are some helpful tips on how to grow out over-plucked brows:

 Don’t touch your brows for three months

This may seem obvious, but for those who can’t stand a messy brow this is very difficult. Throw out your tweezers if you have to because you’ll never know what your brows are capable of until you stop tweezing them completely.

Gently exfoliate

If your brows are sparse due to overplucking, gently exfoliating the area can help stimulate hair growth. Use a soft toothbrush a few times a week and when I say gently, I mean it. If your skin turns red you’ve gone too far

Consult with a trained brow expert

Brow experts have a wealth of knowledge on how best to frame your face, so take advantage. They can determine your face shape and what your perfect brow shape should be for that shape.

See your professional regularly

 Just as you visit your hairdresser every six to eight weeks for a trim, when growing back your brows, you should be visiting your brow expert regularly. They will be able to look at your brow regrowth and determine which areas need tidying up and which need to be left alone to continue to grow out.

Have frequent tints

Tinting your brows a shade darker than your natural hair colour will make them appear thicker and fuller. It will also allow you to better see where new growth is coming in. Use brow powders and pencils to fill in the gaps until the hair grows back. It will also make you feel more comfortable that not everyone is staring at your brows while you are growing them.

Use a growth serum

Like a conditioning treatment for your hair, a brow treatment can strengthen the hairs and assist with healthy brow growth. 
See my post on Wow Brows where I talk about the benefits of 'Brow Boost'.


Application of a brow nourishing product morning and night is vital for having brows that wow.

Brush your brows

 Brush your brows every day to keep them looking sleek. Brows need as much brushing as your hair. After application of your moisturiser to the face, use a brow brush or comb and brush them into place. This is also a must after the application of brow products.

Consider tattooing

New techniques in eyebrow tattooing can recreate the arch naturally and beautifully. The Feathertouch technique uses soft strokes to draw in the individual ‘hairs’ giving a more natural finish. A hypoallergenic pigment is implanted and will generally last between two to five years.

I hope this helps, it seems like a lot of effort for something as simple as eyebrows but once you get a great shape to your brows, you won't look back!!